|
|||||||||||
When taking plants that normally grow in warm countries on the equator and putting them in a small room we need to recreate their natural environment. Sun, soil, rain and wind all need to be simulated to make the plants feel at home. Let's start playing the roll of mother nature. From seed to seedlingGetting the right Cannabis seeds is not that easy. Several companies in The Netherlands specialize in producing seeds and sending them, discreetly, without getting fished out by customs, to nearly all countries in the world. Now for getting the seeds to grow. The surest way to get the seeds to germinate is to place them on a dish on top of something that will hold water, like some cotton wool or some tissues. The material needs to stay moist, but not wet. Now place the seeds on the surface, close the top of the dish with some plastic wrap and make a bunch of small holes in the top to let the air flow through. Keep an eye on the set-up, keep the temperature between 20C and 25C and make sure the surface does not dry out. About 80% of your seeds should germinate after one to five days. The germinated seeds are ready to be planted when the little root coming out is about 3 to 5 mm. Now put every germinated seeds in its own small pot filled with the soil. The pots should be about the size of your fist. Put the seeds about 5mm under the soil. Be carefull when handling them, they are pretty fragile in this stage. Some people use a pair of tweasers when doing this. The seedling will surface after about 2 to 3 days.
If you are not so worried about losing a few seeds you can also just put them in the ground directly. Get some of these small pots, fill them up with the soil you got, make a small hole in the soil with your finger about a centimetre deep and put in one seed. There should be some signs of life after about 2 - 7 days. Keep the temperature of the pots above 20C but below 25C. No need to give the pots any light really, just make sure the soil stays moist, but not wet. There are other ways of getting seeds to grow. For specific information, please refer to the Further Reading section. First light
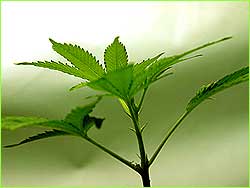
When the plants are about 10cm to 15cm high and seem to have some good roots it's time to get them out of the small pots and putting them in their larger homes.
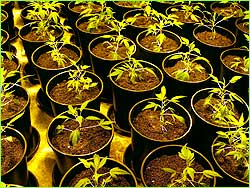
A new home: getting them in place
When the plants are firmly placed in the new pots, add about half a litre of water to all. Now lift the pots and remember their average weight. You could even use a kitchen scale and write it down. All pots should be about the same weight and during the whole growing and flowering stage they should remain about the same. Here comes the sun
The flowering stageSome 4 weeks after showing their little heads the growing stage has come to an end. Your plants should look firm, healthy and have plenty of leafs. They should be about 20cm to 30cm high. Now set your timer to a 12 hours light, 12 hours darkness cycle and place the seedling on even distance under the spread of your lights. Turn on the desk fan and check if he plants move in the air flow. You're all set. Now it's up to them.
Caring every day: the basis for a good relationship
Check the thermometer just to keep an eye on the highs and lows. If it gets under 15C or above 40C find out what's going wrong. Ideally the temperature should remain between 20C - 25C. The most important task for you now is to water the plants. Feel the soil before you start. Water them every day or every other day. Don't forget, the plants won't like it! When watering them check for bugs, dead leafs and lift the pots to feel if they are getting very light. If you are unsure about the level of water in the pots, weigh them again with the scale and check your notes. With fresh soil adding nutrients will only be needed during the flowering stage. I found that about once a week the normal amount as stated on the bottle will be all right. Just do as the bottle says. When watering the plants don't use cold water. Especially in winter it's a good idea to add some warm water to your watering can. Just make it lukewarm. Also spray the plants with some fresh water with your spray bottle. Don't forget to check the air flow from time to time, especially when the plants get bigger. You might want to put the desk fan up on a box or something.
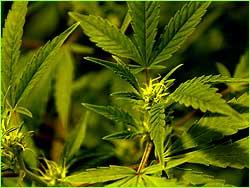
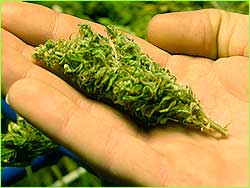
Flowers: The stuff of dreamsAfter 1 - 3 weeks after changing the light cycle there should be some signs of flowering in the plants. See the image above. Males: unwanted
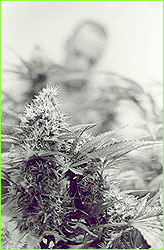
When the females begin to massively produce flowers stop spraying the plants. We don't want the water on the flowers. If the tops of the plants are heavy from the flowers, fix them to the bamboo sticks with a piece of string. Not too tight, you're not growing bonsais. After some 6 - 8 weeks the flowers of the plants will turn brown. When you feel they are ready and look and smell good and are very sticky, just quit giving them water. They will put all their energy in their flowers and the bigger leafs will die. Cut or pull off the dead leafs. Especially those that grow out of the tops. They might rot or spread a fungus. From now on the smell should be really sweat. The THC in the flowers is reaching it's peak. Depending on the variety of your plant you can see it as white crystals on the flowers and the smaller leafs of the tops. It's really sticky stuff. Check your filter set-up if you have one. This is when most neighbours start to become interested.
HarvestingAfter about a week after cutting the water it's time to harvest. Cut off the plants near the bottom. Then proceed by cutting the plants to pieces twig by twig. Cut all leafs away and at the tops cut away the smaller leafs that stick out of them. After cutting all buds, hang them upside down to dry from some thin wire or washing line. Make sure there is no light in the place where you dry the buds and check the air flow around the produce. They will lose a lot of water which needs to be ventilated out. After about a week, when they feel dry enough, cut away the twigs leaving just the small globes of the flowers. Now you are ready to smoke. To conserve and store the marijuana, put it in airtight plastic bags. Store dry and dark. It will stay good for about a year. For long storage you can put them in a freezer.
Bugs, Diseases and ProblemsExtreme failure of the plants is pretty rare. Usually too much or not enough water, a shortage of fresh air or a cold room are the cause. Smaller problems can be bugs or nutrient dosage. Bugs
Nutrient problems
When the plants have curled up leaves and look like they have been burnt, you might have given too much nutrients. Stop giving the nutrients for a while, but give some extra water to flush out the excess nutrients. Remember that soil that has been used multiple times could need some extra nutrients and fresh soil probably needs less. Rotting buds
That's it!Basically that's all there is to it. It all comes down to taking care of your little green friends and pretending you are mother nature. Ofcourse you can make the buds bigger by all kinds of technical tricks. For more on this check our Expert Growing section. For even more information check the Further Reading section. Good growing. And don't forget, do it the EasyGrowing way! |
---advertisement--- |
||||||||||
We strongly advise against illegally growing cannabis! - Terms of Use - EasyGrowing.com © 2005 - 2013
|
|||||||||||